There are a range of activities that you'll complete in iLearn
These include quizzes, blog posts, database entries, Wiki pages, glossaries, and workshops.
Find out more about the different types of activities on iLearn using the quick guides available for you below.
The database activity allows you to create customised entries using a range of formats and structures including:
- image
- files
- links
- dates
- numbers
- text
A database can be used to:
- build a collection of web links, books, journal references related to a subject
- display student-created photos, essays, websites, and poems for peer comment and review
- gather comments and votes on a shortlist of potential project ideas.
Add a database entry
- Click on the Database link in the Activities block or click on the link next to the Database icon
 .
. - Click on the Add entry tab.
- Fill in the database field/s to create the entry.
- Click Save and view or Save and add another to add more entries.
Depending on your permissions, entries can be created, edited ![]() , deleted
, deleted ![]() , commented on, rated, exported, viewed (individually or as a list)
, commented on, rated, exported, viewed (individually or as a list) ![]() , searched, and sorted.
, searched, and sorted.
A Wiki is an activity which allows you to contribute and edit an existing page of information, as well as add new pages. It is a collaborative process between you and the other students in your unit. You can add images, files, and content to each Wiki page.
Edit a Wiki page
- Click on the Wikis link in the Activities block or click on the link next to the wiki icon
 .
. - Click on the Edit tab.

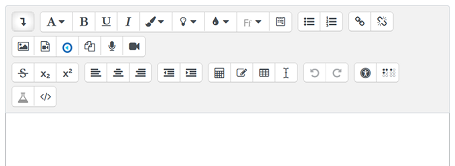
- Use the HTML editor to make changes to the wiki.
- Click on Save to finish or Preview to view.
Upload a file
- Click on the Edit tab in the wiki.
- Scroll down and click on the Add icon
 and locate your file or drag and drop the file.
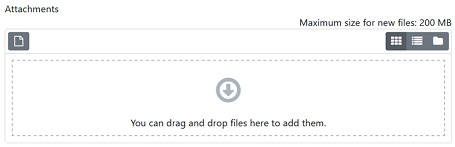
- Click on the Upload this file.
- Click on Insert.
- Click Save changes.
Add an image
- Click on the Edit tab in the wiki.
- Click on the Insert/edit image icon
 .
. - Click Browse and search for your image.
- Click Upload this file.
- Enter an image description.
- Click Insert.
To add a graph to the wiki, you will need to initially save the graph as an image. From there, you complete a similar process to adding an image outlined above.
The quiz activity is an opportunity to assess your level of understanding. It can be used as an assessment task or as an unweighted learning tool.
To access a quiz, click on the Quiz link in the Activities block or click on the link next to the Quiz icon ![]() .
.
Each quiz is set up differently so it is important that you read the quiz instructions very carefully.
The instructions can tell you:
- what types of questions
- the number of attempts allowed
- the time allowed
- the assessment weighting of the task
- the dates that the quiz will open and close
Question types
Calculated – A numerical question that uses wildcards that are substituted with values from a dataset when the quiz is taken.
Essay – The student writes an answer in paragraph or essay format.
Matching – A list of sub-questions is provided, along with a list of answers. The student must match the correct answers with each question.
Embedded answers (Cloze) – A passage of text that has various answers embedded within it, including multiple-choice, short answers, and numerical answers.
Multiple choice – The student chooses from multiple answers in response to a question.
Short answer – The student types a word or phrase in response to a question.
Numerical – Similar to a Short answer question, with the allowance for a continuous range of answers to be given.
Random short-answer matching – Similar to the Matching question, the sub-questions are drawn randomly from Short-answer questions in the current category.
True/False – The student selects from two options in response to a question: True or False.
Calculated – A numerical question that uses wildcards that are substituted with values from a dataset when the quiz is taken.
Glossary is an interactive activity that allows you to create and comment on entries using text and images.
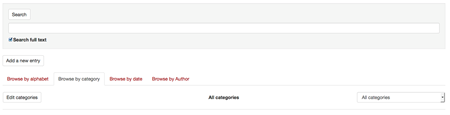
Glossary entries can be displayed, searched, and browsed through in many different formats.
Add an entry
- Select the Glossary link in the Activities block or click on the link next to the Glossary icon
 .
. - Click on the Add entry button.

- Enter a Concept. This will be the name of the glossary entry.
- Enter a Definition. This can include text and/or images.
- The remaining options can be left as the defaults for adding a basic entry. Click Save changes.
Add a category
- Go to the glossary you wish to add a category to.
- Select Browse by category.
- Click Add entry.

- Enter a Concept.
- Enter a Definition.
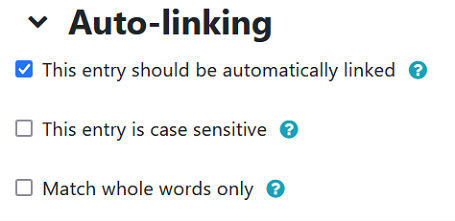
- Assign Automatically link this category from the available options.
- Click on the Save changes button.
The dialogue activity is where you will go to communicate privately between two people in your unit. Dialogues can be initiated between lecturers and students vice versa.
Initiate a dialogue
- Click on the Dialogues link in the Activities block or click on the link next to the Dialogue icon
 .
. - Click on Create.
- Select the person you would like to send a message to by typing their name in the People section. When you start typing, their name will appear in a drop-down list to select.
- Enter a Subject.
- Enter a message into the HTML editor.
- Click Send.
Reply to a dialogue message
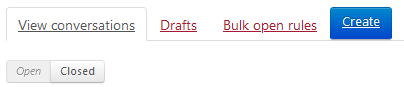
- Go to the View conversations tab.
- Click on the link of the dialogue subject you wish to respond to.
- Enter a reply message into the HTML editor.
- Click Send to send your reply.
The convenor can close a conversation once the conversation has finished to remove it from your current list.
You will be able to view closed dialogues but you won’t be able to add to them.
You will have to start a new dialogue if you wish to communicate with this person again.
The OU blog activity facilitates collaboration.
An OU blog can be used to:
- as a journal
- as a means for personal reflection
- to share tutorial ideas and presentations
- to complete an assessment task
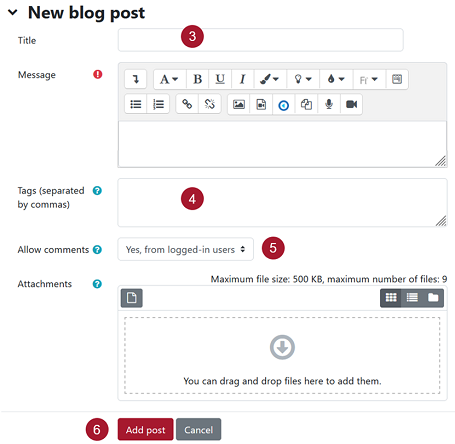
Add a blog post
- Click on the OU blog link next to the OU blog icon
 on the unit homepage or in the Activities block.
 - Click on the New blog post button.
- Enter a Title and the body of your post in Message.
- Enter tags separated by commas. Tags are optional but useful for organising posts – by clicking on a tag, available in a side block, you see all posts that have been classified with that tag. You may wish to suggest some common tags for collaborative blogs.
- Assign Allow comments to yes or no.
- Click Add post.
The choice activity allows the lecturer to ask a question and specify a selection of multiple responses for you to answer.
This can be useful for finding out what topics you would like to discuss more often, signing up for group or research projects, and more.
The lesson activity presents a series of pages in sequential order.
You are usually asked to make choices to navigate from start to finish.
The choices will determine the pages that you will see.
Lessons consist of three key features:
- content pages
- question pages
- navigational buttons
Workshop is a collaborative activity, perfect for facilitating a peer review task. Projects within workshop can be graded by peers, lecturers, or a combination of the two. Specific assessment criteria can be given to support the assessment of a workshop activity.
The Group selection activity allows you to self-enrol in the group you wish to become a member of.
Ground Floor, 18 Wally's Walk
Macquarie University